Wednesday, March 31, 2010

WHAT’S UP WEDNESDAY…April Fool’s Day

aprilfools

April Fools Day is so much fun, especially if you like to prank people like I do!  My mom was a big jokester for April fools day and made it lots of fun.  I have SO many great memories of April fools day and all the pranks she played!  Last year my kids were looking forward to April fools day, probably because I kept talking it up and telling them I was going to get them good!!  The night before I switched the cereal in the 2 of the cereal boxes, stuffed newspaper in their shoes and put a toy lizard and toy snake in their sandwiches for lunch!  That morning I got to witness my pranks...Briggs started to pour his choice of cereal and when he saw that it wasn't the right cereal he said, “what the...”, looked at me and started laughing.  Jer came down and did the same thing!!  He said, “I can't believe you already got me mom!!”  Then they both went to put their shoes on and to their surprise there was newspaper stuffed inside...”awh mom, you got us again,” they said!  They both started talking about how they were going to get me good.  When I went to pick them up from school I asked them if they had any more April fools surprises.  MOOOMMM you put a snake/lizard in my sandwich!  They thought it was quite funny.  When we got home Briggs walked up to me with a somber look on his face and handed me a paper.  It was a behavior sheet.  It is the discipline action the teacher takes when a student has acted out several times in one day.  On it was marked 4 times, once for Briggs acting out, once for talking when he should be listening, once for not standing in line, and the others I can't remember.  I looked at Briggs and said, "I guess we need to have a talk about his don't we" (I was seriously surprised) then he flipped the paper over and yelled, "APRIL FOOLS!" On the back was a note from his teacher saying it was an April fools joke!  He totally got me good!!!  I was so impressed at how he kept a straight face and waited for the perfect moment!

I also got my husband pretty good.  I had been scheming up this plan for a week, basically a few days after Emily told us she was prego.  The week before the 1st I started acting like I wasn't feeling so well in the morning and getting headaches a lot.  I also acted as if I was so exhausted by the middle of the day and always complaining to Ben about my low energy.  Finally the day came, I had to go to mutual that night so before I headed home I picked up a pregnancy test from Emily.  I got home and immediately sat down next to Ben on the couch.  I started telling him how tired I was and how I wasn't feeling great.  He turned to me and said, "What if your pregnant?" (I couldn't believe how easy he was making this for me:)) I played off like that wasn't the case, but he insisted I go take a pregnancy test.  I didn't want to seem too anxious so I said I would after I rested a bit.  I finally went up stairs and tried to take some time so that he thought I was actually waiting for the test results.  As soon as I thought I waited long enough I slowly walked down our stairs with he pregnancy test in my hand and stopped in front of Ben, waited for him to look up at me and said, "I'm pregnant"  "Holy crap are you serious?" was his reaction.  So I showed him the test.  I could see the wheels turning in his head as he started asking all these questions, What are we going to do?  Do you think everything is going to be fine?  How did this happen? I finally could tell that he was really freaking out so I said, "April fools!" He looked at me very confused and then looked at the pregnancy stick, "but it says positive?!" I then told him that I had Emily pee on the test for me(since she was prego) He was totally smiling by now and telling me I got him good, he just kept telling me over and over that I really did fool him...it was really funny and he was such a good sport!

APRIL FOOLS 2010 will look something like this:

An April Fool’s breakfast my mom has done in the past…pancakes with cardboard in the middle.  My kids will love that. 

This joke I found at Rachel’s Blog they might not love as much:

Salt on the Toothbrush- Pretty funny--take someone's toothbrush in your family and sprinkle a little salt on it before they brush their teeth. (she has a few other cute ideas you can check out)

I’m not sure what I’ll do in their lunches…hummmm better think of something quick!

But for dinner I believe this will be a hit:

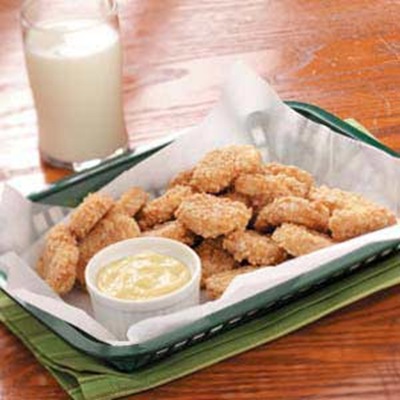
Faux Chicken Nuggets

exps31616_CW950599D39B

Its actually pound cake!!!  I’ll have real chicken nuggets ready after the joke is played.

As for my husband, I better not tell since he follows our blog!!!

- Happy April Fool’s Day, Cammie

Tuesday, March 30, 2010

TASTY TUESDAY…Easter Bird Nests

IMG_0886

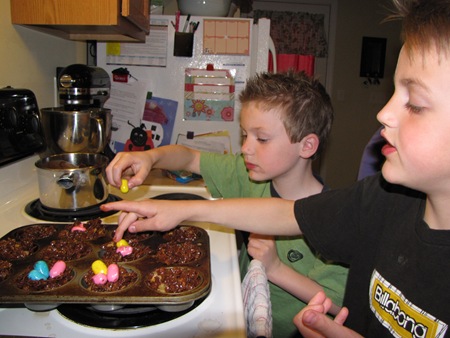
Last year my oldest, Jer brought home a recipe called Easter nests from school.  His teacher made them for his class and since all the children loved them so much they asked for the recipe.  We decided to make them for our Easter dessert.  It was such an easy treat to make.  The kids helped out a lot by mixing and pouring and adding all the pretty colored eggs.  The best part about them was that they were SOOO yummy!  Even the daddy's all loved them!  There is a funny thing about the eggs....I asked my hubby Ben to run to the store and pick up some Easter candy eggs I told him the chocolate ones or malt ball ones and he came home with bubble gum eggs.  He thought he was getting the right thing and didn't realize they were bubble gum, so we warned everyone that they may want to eat the nest first and then chew on the eggs later if they'd like!  :)  So be sure to get the right eggs!

IMG_0877

EASTER BIRD NESTS

  • 3 C. chocolate chips
  • ½ C. butter
  • 4 Tbs. honey
  • 8 C. corn flakes

In medium sauce pan add butter and honey and melt slowly over low heat. Take off heat, add chocolate chips and mix well to let chocolate chips melt. Pour corn flakes in large mixing bowl. Pour melted mixture over corn flakes and stir until well coated. Spoon into regular size muffin tray. Put 3 candy eggs in each nest. Let chill for one hour. Use a spoon to remove from muffin tray. Makes 24 nests.

- Cammie

Monday, March 29, 2010

MANIC MONDAY…Address book labels

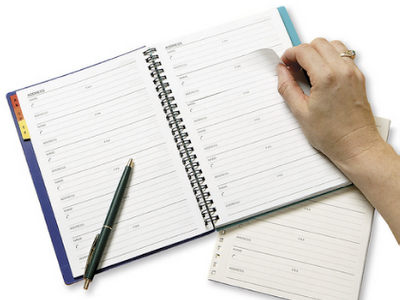
I LOVE this idea from The Idea Room and I am currently working on getting my address book to look so good!!! 

lifetime-address-book

Who hates it when their address book if finally up to date and some one moves?  Now you have to scratch it out and your pretty address book now looks like chicken scratch!  Well I saw this idea where you create all your addresses on labels, then print and stick.  When someone moves, type their new address and stick it on top of the old one!

I also found a site called Jeri’s Organizing and Decluttering News.  They did a whole post on different companies that sell address books where Addresses are written on peel-and-replace labels.  How cool is that?

- Cammie

Friday, March 26, 2010

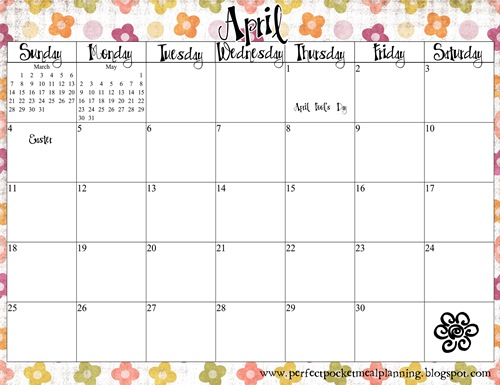
FREEBIE FRIDAY – April Calendar

Can you believe it’s almost April?  Bring on spring! 

april calendar 
Go HERE to download the April calendar.

Thursday, March 25, 2010

TEACH ME THURSDAY – Baby Things

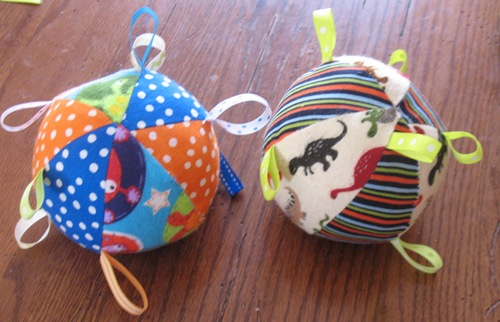
This is not a new concept, but I just made a couple of these cute loopy balls, and LOVE them!  What a great idea for a baby gift or for your own little one.  They are super easy, and even my 2 year old loved it!  I found this great tutorial and pattern the other day and just had to share.  Thank you New Conceptions!

Here’s what I made:

IMG_4576

-Emily

Wednesday, March 24, 2010

WHAT’S UP WEDNESDAY – My Latest Project

This is what’s up today…

IMG_4564
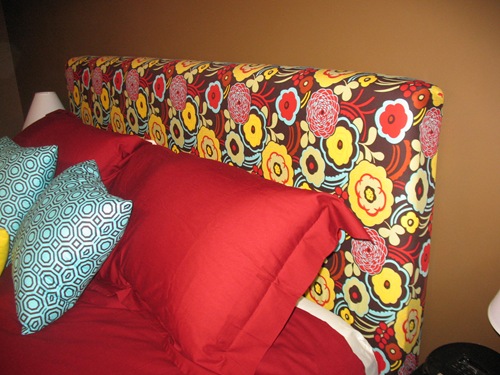
My new headboard and pillows.  I actually made the headboard a while ago, but found this new fabric for it recently.  I’m in love with the whole thing!

IMG_4563  The pillows to match…LOVE them!

IMG_4562
The whole shebang!  I still have some stuff to do in our room, but this part just makes me happy.  I smile every time I see it!

-Emily

Tuesday, March 23, 2010

TASTY TUESDAY – Let’s Start Thinking About Easter

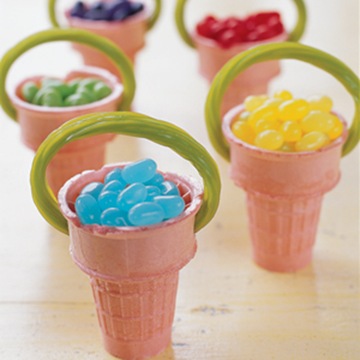
Easter is right around the corner, and since I love any excuse to make a treat, especially a fun one with the kiddos, I thought I’d post this super cute,  super EASY Easter treat idea.  Mini Edible Easter Baskets.

easter-basket-jelly-beans-300
(I did not take this picture, I found it in a Google image search…so I really don’t know where it is from!)

All you need are some ice cream cones (like the ones in the picture), jelly beans (which are everywhere right now!), and some apple licorice.  I didn’t even know there was such a thing as apple licorice, but I would imagine any green candy like it would work.  Or any color for that matter!  Get creative!  Either way, 3 things!  This is a good one for younger kids, with a tiny attention span, to help with.  Anyway…fill the ice cream cons with jelly beans.  Then, with a knife, poke a hole on either side and stick the licorice (or whatever) in to make the handle.  I think it would be even cuter to add some green colored coconut before adding the jelly beans, to look like that annoying green grass stuff! 

There you have it…an Easter inspired Tasty Tuesday! 

-Emily

Monday, March 22, 2010

MANIC MONDAY – And the Winner Is…

Today’s Manic Monday is the moment you’ve all been waiting for…the WINNER of our give away!  And the winner is (using Random.org)…

#52
Anonymous said...
hi!! I have been waiting one of these so much!!
I LOVE #18!!
thanks for ofering this give away!!
mom_bjl@hotmail.com

Congratulations!  Please email us by WEDNESDAY, March 24, 2010, before midnight.  We will need your name, address and pocket design choice.  YAY!!

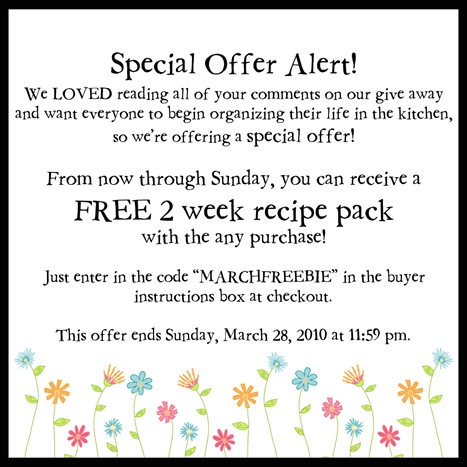
special offer2

Obviously we consider our pocket meal planner to be an excellent way to organize your life in the kitchen, so what a perfect Manic Monday topic!  For a quick refresher course on why we started this whole thing, you might want to take a look HERE

If you’re visiting us for the first time, or just recently found us and want to learn more about our system, watch our short video tutorial HERE.

We are all about helping you simplify meal planning, keep your family consistently fed (no more pancakes every night!), and save money in the process!  And to top it all off, our pocket designs are just too darn cute!  We’d love to hear any comments you, awesome readers/customers, have on how our system is working for you!  Hopefully it’s a great for you as it is for us!

-Emily

Friday, March 19, 2010

FREEBIE FRIDAY – One More Chance

For today’s Freebie Friday, we decided to extend our giveaway and give you all one more chance to win a FREE Monthly Pocket Package!!!  So, you can now TRIPLE your chances of winning:

1.  Pick out your favorite pocket HERE and leave a comment telling us which one you want to win.
2. Blog or Facebook about our give away, and then leave another comment including the link.
AND YOUR EXTRA CHANCE…
3. Leave a third comment telling us the recipe you are most excited to try by looking
HERE.
(Leave comments on either this post or the original
give away post.)

This giveaway will now end SUNDAY, March 21, 2010, at 11:59 pm.

The winner will still be announced MONDAY, March 22, 2010.

Thursday, March 18, 2010

TEACH ME THURSDAY – The Promised Pants

First of all, we are having a give away going on right now, so don’t forget to CHECK IT OUT!

Now, on to today’s tutorial.  I mentioned last Thursday that I’d post the tutorial for PJ pants sometime.  Well, today is the day!  And, I found an even better and EASIER way to make them!  Yay!  Rookie Moms has a great video tutorial on making toddler pants from an old t-shirt.  But, I took the concept and used fabric instead!  So…

Supplies needed:
Fabric (yardage depends on how big your kid is! I made pants for a 2 year old and a 4 month old out of 1 yard)
Pair of pants that fit your kid
elastic
scissors
sewing machine

Directions:
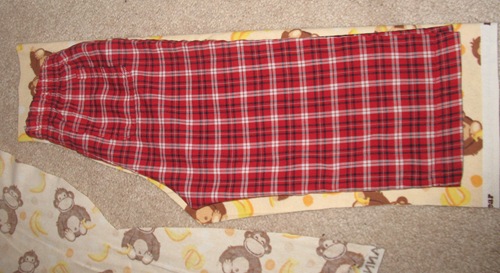
1.  Fold the pants that fit your kid in half and lay it on the fold of fabric.

IMG_4535

2.  Cut around pants, making a little longer at the top and bottom to allow for hem and waistband.
3.  Using the piece you just cut, cut a second, identical piece (remember to keep the straight side of the pants on the fold).
4.  Now, open each cut piece and lay right sides together.

IMG_4537

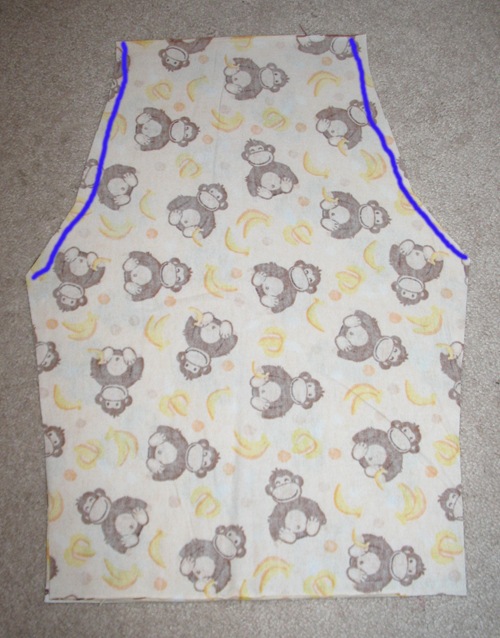
5.  Sew on the curved sides, stopping at the point.

where to sew

6.  Pick up the sewn together fabric at the top and pull apart to make pants (Rookie Mom’s video helps with this a lot).  For some reason, I stopped taking pictures at this point!
7.  Sew the legs closed.
8.  Sew hems on the legs.
9.  Fold the top over twice to form a waistband.  Sew it, leaving an opening to insert the elastic.
10.  Attach a safety pin to the end of the elastic (measure you kid to see how much you need) and push it through the waistband.  Sew opening shut.
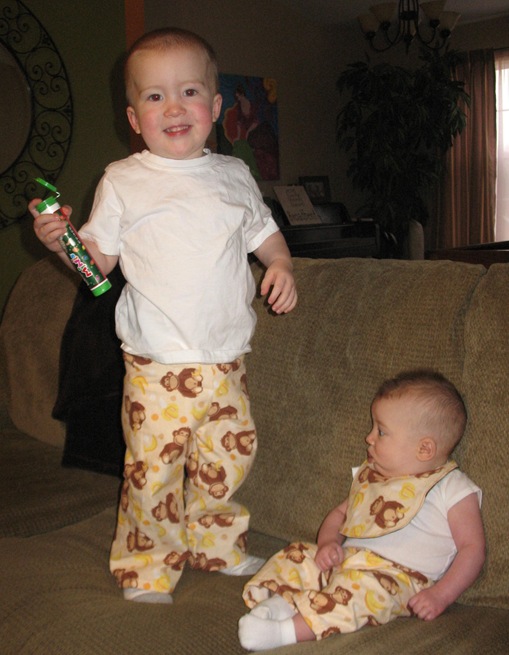
11.  Try the pants on your kid and smile!  Here’s my kiddos…IMG_4550

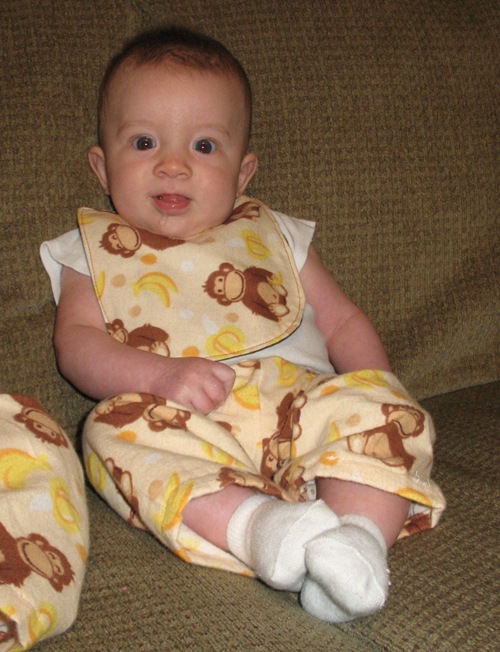
IMG_4555 I bribed my 2 year old with M&Ms, and this is as good as it got!  I also had just enough fabric to make a bib for my little man! 
IMG_4557
Happy sewing!  Don’t forget about our give away! 

-Emily

Wednesday, March 17, 2010

WHAT’S UP WEDNESDAY – It’s a Giveaway!

*Give Away Closed*

Happy St. Patrick’s Day!  We thought it would be fun to do a giveaway!  Hopefully this day will bring you luck!!! 

Here is what we are giving away…

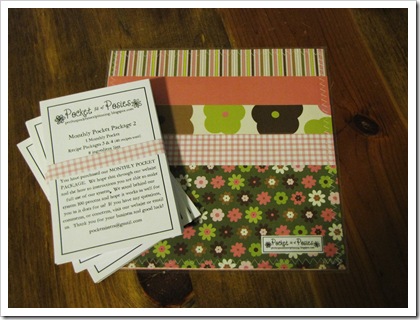
Our Monthly Pocket Package 2 
PLUS Recipe packs 1 & 2                                             
this includes:
1 Monthly Pocket
4 months of recipes (80 recipes)
16 ingredient lists
How To instructions

HOW TO ENTER:
Pick out your choice of POCKET by clicking here.
Leave a comment on this post telling us the pocket you want to win! 

EXTRA ENTRIES:
To DOUBLE your chances, post on your Facebook or blog about this giveaway and come back and leave another comment including the link to your Facebook or blog.

This Giveaway ends FRIDAY, March 19, 2010 at 11:59 pm. 

The winner will be announced MONDAY, March 22, 2010

- Good luck, Cammie
Tuesday, March 16, 2010

TASTY TUESDAY – Rainbow cupcakes

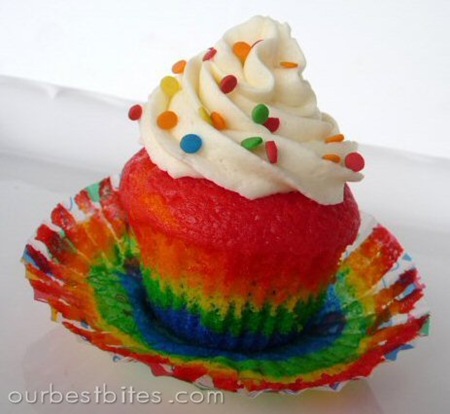
I recently saw some rainbow cupcakes on a blog(I can’t remember which one) and I thought they looked so bright and fun…perfect for St. Patrick’s Day AND the gloomy weather we’ve been having!!  I searched and found the picture and recipe at Our Best Bites.

5_single_cupcake_crop

Colorburst Cupcakes
1 white cake mix
2 eggs
1 C sour cream
1/2 C milk
1/3 C vegetable oil
Combine all ingredients until incorporated (about 30 seconds). Scrape sides of bowl and then beat on med-high speed for 3 minutes.
Divide batter according to how many colors you are using. I used 5 colors and it worked out to a little over 1 cup for each color.
Use food coloring to color batter to desired intensity. I used a 1/4 t and they were very bright! You could easily make pastel rainbows using a little less.

To get a layered stripe like I used, you'll want to put a spoonful of each color in the cupcake one at a time. The batter is thick, so it won't spread on it's own. A great tip is to set out a little bowl of water where you're working. Dip your finger in the water and then gently spread the batter out. The water will make it so the batter doesn't stick to your fingers.
Another tip is to use a measuring spoon and some water to measure out how many teaspoons/tablespoons are going to fit in your cupcake. Then divide that by how many colors you have so you know how much of each color to use for each cupcake. For my 5 colors, it worked out perfectly with 2 t of each color in each cupcake. So I put in 2 t of blue in the bottom of each cupcake and spread it out with my finger. Then I put in 2 t of green on top of that, then yellow, etc.
Bake them according to the package directions, until a toothpick comes out dry. Check these babies out! I swear I didn't photoshop these. True crazy colors. I love how you can see the rainbow through the papers. If you want blue on top, just reverse the order (duh, right?)

- Happy baking, Cammie
Monday, March 15, 2010

MANIC MONDAY – Top 5 ways to organize

The first trimester of pregnancy has really kicked me in the rear when it comes to having an organized home!  I am the type of person that has a good schedule, gets things done, and keeps up with life.  BUT…my laundry is out of control, my house is clean 50% of the time(and that’s pushing it), my home seems to be a little less organized by the day!  I am looking forward to feeling better and especially to start the nesting stage, where I go crazy with the organization!!  So I thought since I need to get our home back to the state it belongs I better find a good system.  I found this article on 10 ways to organize and simplify your life by Maria Garcia on Christian Mommies.  I really liked several of her ideas, but I picked my TOP 5!

1.  LESS IS MORE. It's more important to have a few nice things that you truly enjoy, than to just have lots of stuff. Say goodbye to things that don't fit, are out of style or are unflattering. This goes for clothing, furniture, knick knacks, and other possessions you're not happy with.

2.  DON'T TRY TO REMEMBER EVERYTHING. There's no need to store it in your memory. Write it down, and write it in one place so that you can find it easily.

3.  PLAN EACH DAY. Spend 10 minutes each night, planning for tomorrow. You'll be focused and ready to take on the world each morning!  (I do this most the time and when I do, it makes all the difference in my day!!)

4.  GET HELP. Don't try to do everything yourself. Split up household responsibilities among family members. Delegate to your staff. Outsource projects, repairs and so on.

5.  DON'T SWEAT THE SMALL STUFF. Don't allow trivial matters to aggravate you.  If the milk spills, wipe it up and move on to more important things.

- Cammie
Friday, March 12, 2010

FREEBIE FRIDAY – St. Patrick’s Day Cupcake Toppers

Today’s Freebie Friday is something to get you thinking about St. Patrick’s Day!  I love cupcakes, and cupcake toppers just really make cupcakes look so cute!  So I whipped up St. Patty’s Day cupcake topper for anyone out there looking for an easy, but festive St. Patty’s Day idea! 

cupcake topper1cupcake topper2 


Click HERE to download the printable version (lots on one page).  All you have to do is cut them out, glue or tape two to a toothpick (one on each side), and stick on the cupcake!  Easy peasy!  Happy St. Patrick’s Day!

-Emily

Thursday, March 11, 2010

TEACH ME THURSDAY – My New Favorite Project!

First of all HAPPY BIRTHDAY CAMMIE!  Yup, today is Cammie’s big day!  We love birthdays, and our hubbies spoil us…we are so lucky!  Hope your day is great!  And happy birthday to any other March babies out there!

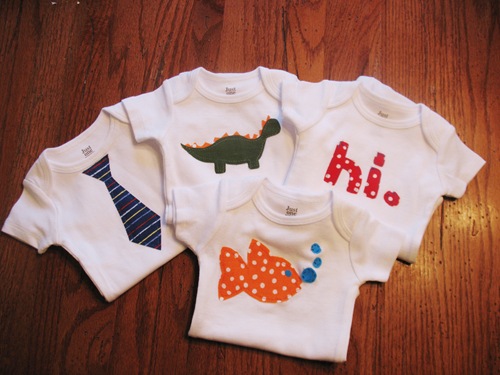
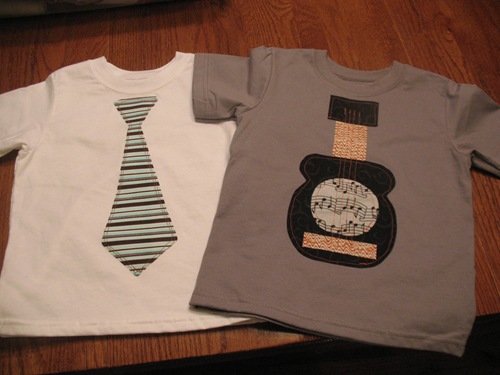
Now, are you ready to get up close and personal with the cutest onesies and shirts you’ve ever seen!  Ok, I may be a bit biased, since I made them, but they are just so darn cute!  And they were pretty simple to make too!

IMG_4474

IMG_4453

IMG_4459
(the back of the guitar shirt…love it!) 

What you need:
onesie, or t-shirt (any size)
fun fabric (I dug through my box of scraps, you don’t need much!)
Heat-n-Bond Lite interfacing (available at craft stores like Michaels and even some Walmarts.  You can use regular iron on interfacing, but it’s pretty stiff.)
Sewing machine, or needle and thread, your choice!
Iron
Scissors

What to do:
1.  Figure out what you want on the onesie or shirt.
2.  Draw it out or print it out on a piece of paper; cut out.
3. Cut a piece of fabric that is big enough to fit your paper pattern.  Cut a matching piece of interfacing and iron on. (Follow directions on packaging.)  Make sure your fabric is facing the right way!
4.  Trace the paper pattern onto the paper side of the interfacing now bonded to the fabric (remember to flip the paper pattern backwards so that when you iron on to the onesie or shirt, it will look right!)
5. Cut out design, and peel off the paper from the interfacing/fabric.
6.  Center your design (or not, your choice!) on the onesie or shirt and iron in place (follow directions on interfacing packaging).
7. Sew around design either with sewing machine or by hand.
8. Show all your friends how amazing you are and how cute your kids are in their new shirts!

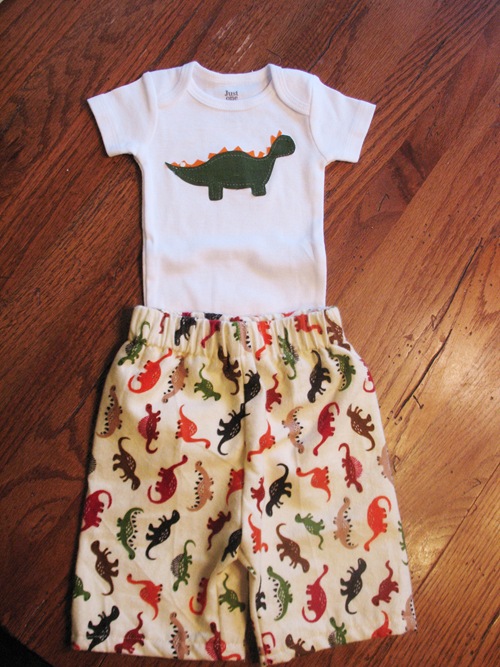
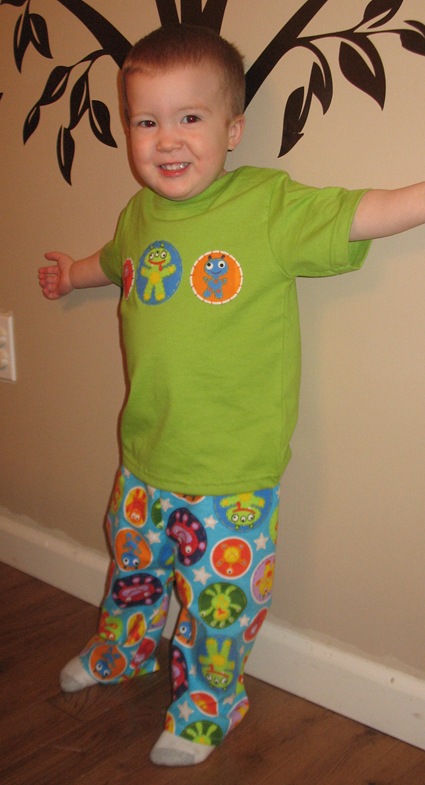
Now, because I’m a little crazy, and I get really in to projects I think are too cute, I also made some cute PJ pants that matched a couple of these designs!  I made matching dino pants for the dino onesie (and gave it as a gift at the shower) and I made a PJ set for my little guy…

IMG_4473

IMG_4449 

I’ll post a pants tutorial in the future if anyone is interested!

-Emily

Wednesday, March 10, 2010

WHAT’S UP WEDNESDAY – The Baby Shower

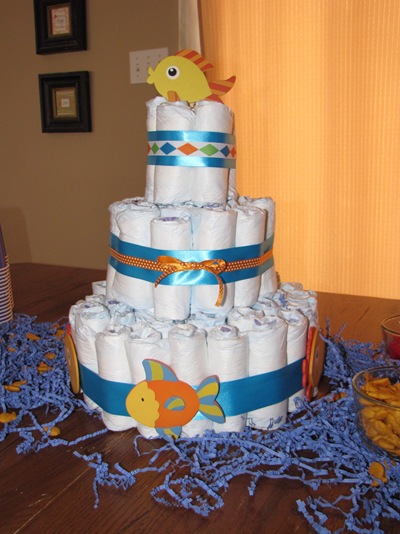
The baby shower Cammie and I hosted Saturday was a fish theme.  We like to keep things simple (and cheap), so we did some very basic, but super cute decorations and food…
IMG_5850 
The diaper cake…who doesn’t love a cute diaper cake?! 

IMG_5848 
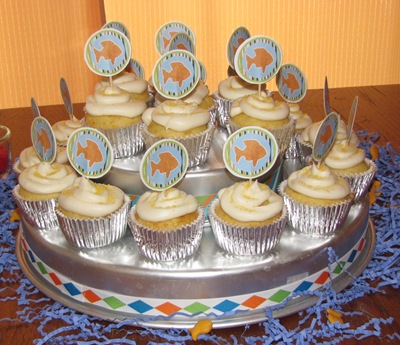
The cupcakes (from yesterday).

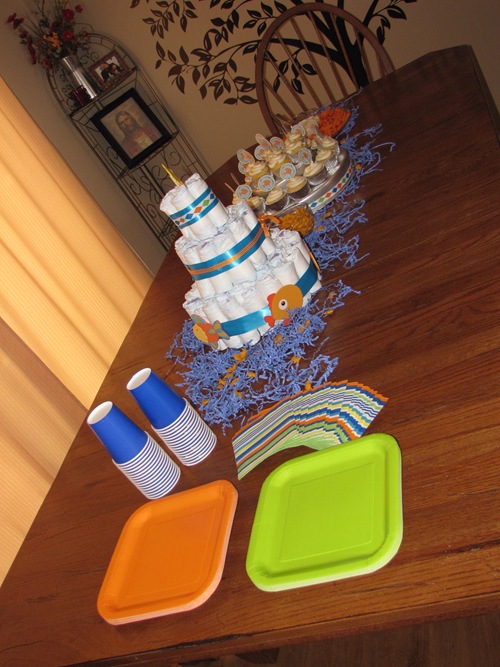
IMG_5847 The table with very simple snacks.  Goldfish (of course!), Sweedish Fish, carrots and dip, mint chocolate cake balls (SOOO GOOD!), and of course the yummy cupcakes.  It was a small shower, so we kept it simple!

IMG_5843 Here’s my favorite though, the banner we did.  I made the cute onesies (more on these coming tomorrow!) and we decided to hang them for decor!  So easy and so cute!

There ya have it, that’s what’s up this Wednesday!  A very simple, but very nice fish-themed baby shower!

-Emily

Tuesday, March 9, 2010

TASTY TUESDAY – A Baby Shower and Some Cupcakes

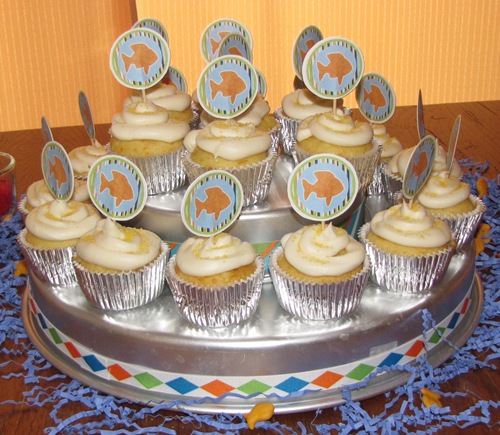
This weekend Cammie and I hosted a baby shower for a friend of ours.  This is her first baby, and she’s having a boy!  Cammie and I totally know boys, and had a blast throwing this party!  (I LOVE parties!)  I will share more from this fun baby shower this week, but for today’s TASTY TUESDAY I wanted to share the super yummy cupcakes we made.  (The shower was a fish theme, very cute!)

IMG_5848

I have no idea what they are called, but they were WAY easy (my favorite kind!) and WAY yummy (my more favorite kind!).  Get this…

1 White Cake mix
1 C. white chocolate chips
2 Tbs. orange zest
Mix cake mix according to box directions (water, oil eggs).  Add white chocolate chips and orange zest.  Spoon into lined muffin tin and bake according to box directions.
*TIP: to avoid chocolate chips from sinking to the bottom and melting into a crust, shake them in a baggie with about 1 tsp. flour before adding to cake.
Frost with you favorite butter cream frosting recipe.  YUM!

That’s it, we whipped these out in no time, added a cupcake topper (that Cammie made on the computer and printed, way easy!) and called it perfect!  Mmmm, I didn’t get enough!

-Emily

Monday, March 8, 2010

MANIC MONDAY – Dell Dock and Google Sidebar

I spend a lot of time on my computer.  Everything I love to do I can do on my computer.  Scrapbook, email, blog, internet, you get the picture.  Basically, my life is in my computer (thank goodness for external hard drives, by the way!).  Last week Cammie shared her system for organizing digital pictures, which she loves (and so do I because I copied her way!).  This week, I am sharing my most favorite thing about my computer…the Dell Dock.

Unfortunately, you cannot experience the genius of the Dell Dock, unless you own a Dell computer.  I’m pretty sure the Dell Dock is an imitation of whatever Mac computers have, but I’ve sadly never used a Mac.  Anyway, the Dell Dock is the perfect way to organize everything that normally sits on your desktop (and ends up covering the entire screen if you’re anything like me!)

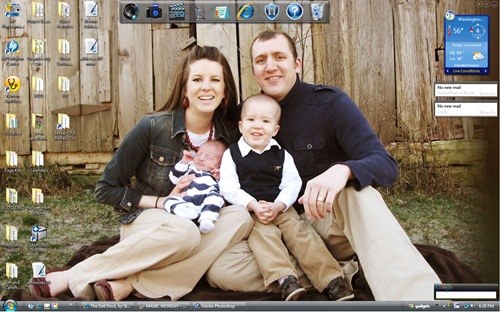
Here is what my desktop looks like:

desktop

You can actually see the picture!  The Dell Dock is the thing across the top of the screen…

desktop2

And everything I use the most is hidden within the little icon/picture things.  So, from left to right:
1. Anything to do with music
2. Anything to do with pictures (My Pictures, Photoshop, Live Writer, Picasa, etc.),
3. Video stuff (video editing, My Videos, etc.)
4. Documents, spreadsheets, etc.
5. My calendar
6. Internet shortcut
7. Security settings
8. Help stuff
9. Recycle Bin
Here’s what the picture of the camera (#2) looks like expanded:

desktop3 
The cool thing about the Dock, is that it is totally customizable to you.  There are tons of different icons and categories to organize your computer the best way for YOU!  I fell in love from day 1!

Finally, the other thing I love about my desktop, is the Google sidebar.  It doesn’t help in organizing at all, I just like it.  So many things to choose from to add to it, but I like to keep it simple…

desktop4


My favorite Gadget (as they are called) is the gmail box.  It links to your gmail account(s) and tells you how many new emails you have!  I love that I don’t have to sign into each of my accounts just to see if I have mail.  If the little box says that I do have mail, all I have to do is click the “go” button and it takes me to the sign in page.  Love it!  (I love checking my email!)


So, there you have it!  A tour of my desktop!  It makes me at least feel organized!  Even when the folders under all the pretty pictures might be a mess! 

Happy organizing!

-Emily

Friday, March 5, 2010

Freebie Friday – File Folder Games

I got into file folder games several years ago, when my oldest son was about 4.  He has always been my learner and loved any learning project I came up with.  I found a few free file folder games online that I printed and put together back then.  One of the free sites are Mormon Chic. They have 3 or 4 free games you can print out.  My kids favorite is dress the bear.  But the other day I happened upon another free file folder site that has SO many to choose from!  They all look so cute.  I am going to print a few myself for Ali.  The site is called File Folder Fun.  You do have to become a member, but it’s free!  You can search their games by grade level starting at preschool, and they are all so darn cute!  I love using my file folder games at home, in the car (especially on a road trip) and at church.  So go take some time search these sites, print a few out and you’ve got some fun games for your kids! 

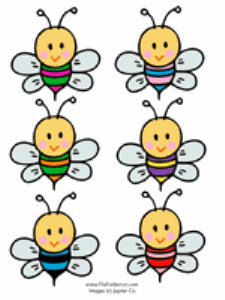
Here are a few example of the games:  The first one is a matching game for preschool age and the second one is the Oregon Trail for second grade.  They have SO many games to choose from!

BeeColors3 OregonTrailFFGTP

-Cammie

Thursday, March 4, 2010

Teach Me Thursday – Nursing Cover

Since my youngest child and this baby are going to be about 4 1/2 years apart I have discovered some new and exciting things to make in baby land!  One of those things is a nursing cover!  In the past I have used blankets and I had many issues of it being kicked off, blown off or just not covering me completely.  So I decided to make me one!  I want to start making all kinds of things for this baby but most of them require me knowing the gender!  Thankfully I could make this nursing cover, regardless of what I’m having.  I actually didn’t follow a tutorial, I had one my sister in-law gave me that wasn’t my taste and a bit too small, so I took it apart and figured out how to make it.  I did however bookmark a great tutorial on how to make a nursing cover HERE.  This would make a perfect baby shower gift!

Here are a few pictures of the one I made:

IMG_5827 IMG_5830

My daughter wanted to model it…isn’t she cute?!?!

- Cammie

Wednesday, March 3, 2010

What’s Up Wednesday – Some News…

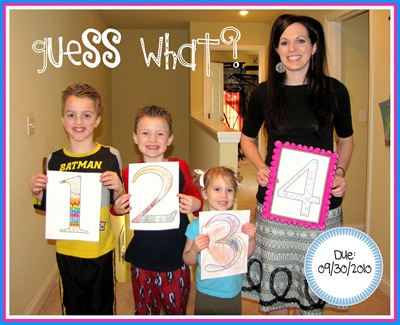
1Announcing baby # 4

Our family is growing!  We are so excited to be pregnant with baby #4!  I am about 10 weeks now and it feels that way.  I am lucky that I don’t get too sick, I get nauseous here and there, but mostly I am SO tired!  I have lost my energy and can’t wait to get some of it back soon, but its so worth it! 

- Cammie

Tuesday, March 2, 2010

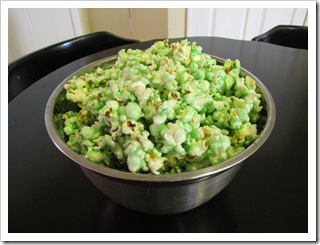
Tasty Tuesday – St. Patrick’s Day Popcorn

IMG_0558

St. Patrick’s Day is such a fun and easy holiday to celebrate.  Growing up my mom made the day fun with food!  Our breakfasts were green eggs or green pancakes.  For our lunches she would make or buy green bread for our sandwiches, green grapes, green kool-aid and green popcorn balls!  I have kept the green food tradition alive and my kids love it!  They love green eggs and they especially love the green popcorn, who am I kidding I love the green popcorn too!  Here is the recipe:


Caramel corn

**Just add a few drops of green food coloring before pouring over popped popcorn to make it green.

-Cammie

Monday, March 1, 2010

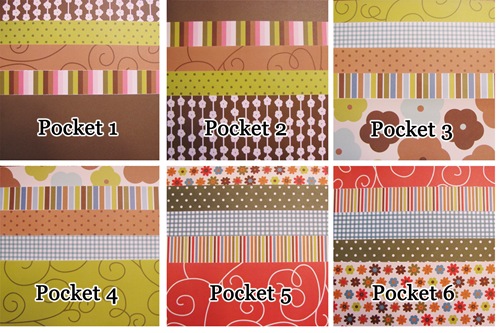
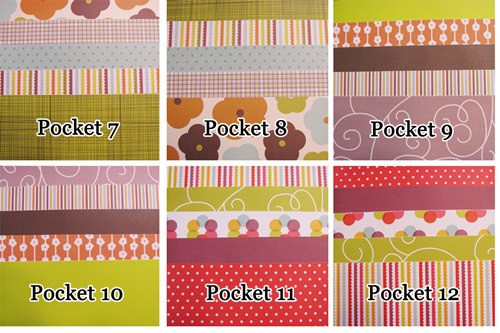
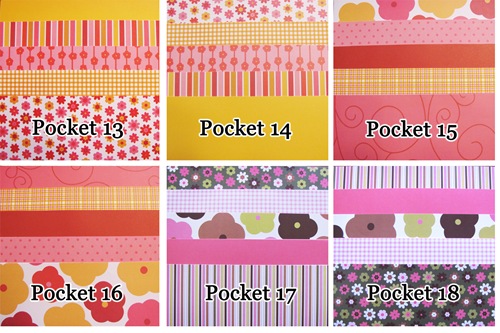
New Pocket Designs

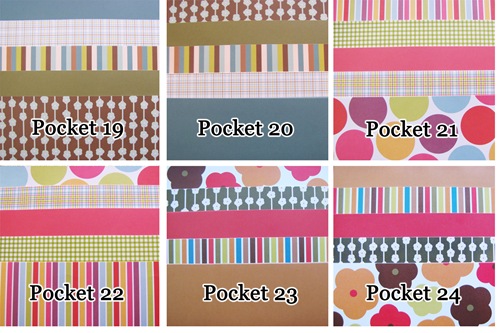
Yay!  We’ve got 24 new pocket designs to choose from!  Take a look…
 1-6

7-12

13-18
19-24

-Cammie & Emily

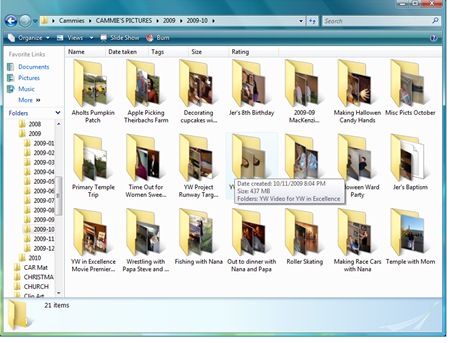
Manic Monday – Organizing digital pictures

I LOVE pictures!!!  I love capturing all the major events in my families lives and I love capturing the little moments of life, basically I always have my camera and yes, my kids are used to me taking a million pictures and begging them to smile!  After I take these million pictures my favorite thing to do with them is scrapbook, digital scrapbook.  Both Emily and I got into digital scrapbooking almost 4 years ago.  We both love being able to create pages without making the mess, so digital was perfect for us both.  When I first got my digital camera and got into digital scrapbooking I knew I needed a better system on how to organize my pictures.  I remember searching for how others organize their pictures, but nothing really was working for my brain.  Finally I came up with the best way for me to keep my pictures organized.  Here is how I do it.

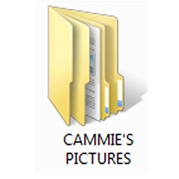
1.  I have a folder called CAMMIE’S PICTURES:

cammies folder

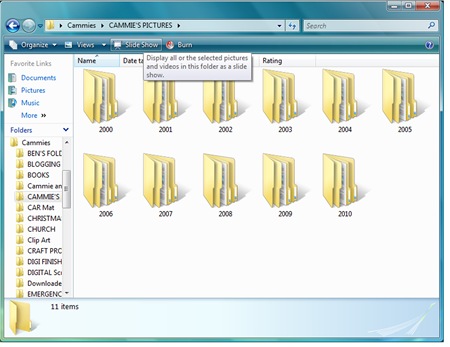
2.  In that folder I have a folder for each YEAR:

dates

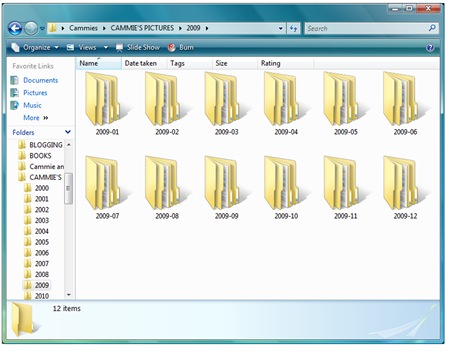
3.  In each year I have a folder for each MONTH:

the year

4.  In each monthly folder I have folders for the EVENTS of that month:

events

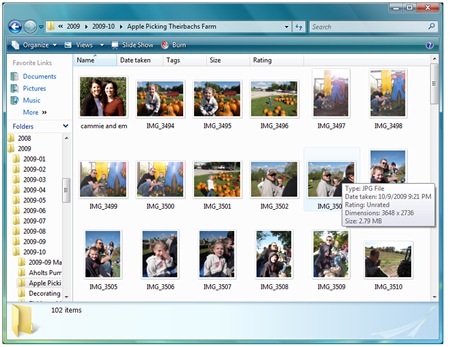
5.  Then of course the actual pictures are in the corresponding event folder:

pictures

This simple way totally works for me for several reasons, one being that I remember when things happen by date so it’s easy for me to find a picture I am looking for.  Another reason this works for me is when I scrapbook the events are in their own folder and ready to be put in a cute layout.  Of course there are so many ways to organize digital pictures but I thought I might share my way in hope it may help someone!

Good luck organizing!  - Cammie